Custom Identification
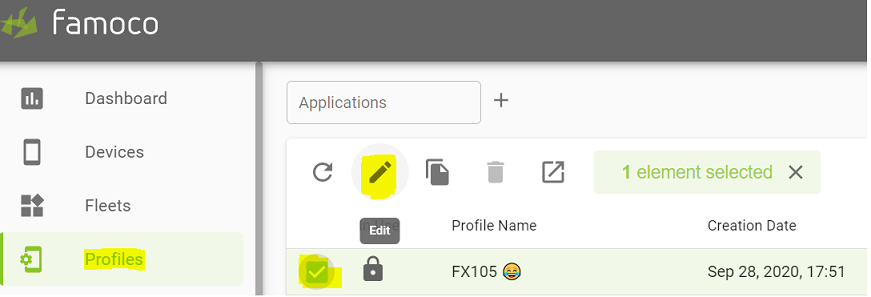
1/ Go on MDM Profiles
2/ Select the profile and click on Edit
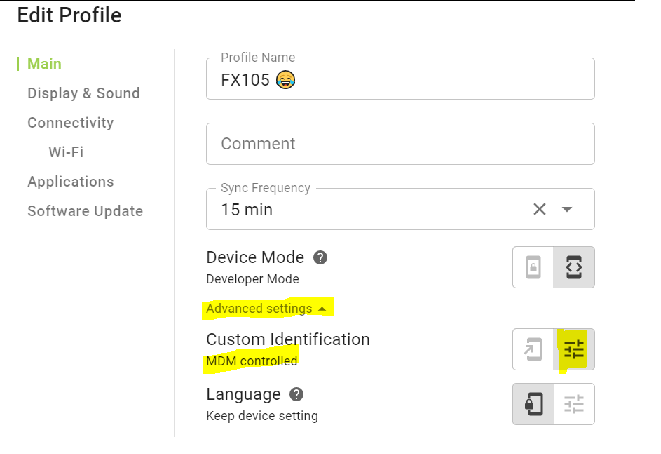
3/ Click on advanced settings and choose the option MDM controlled under Custom Identification
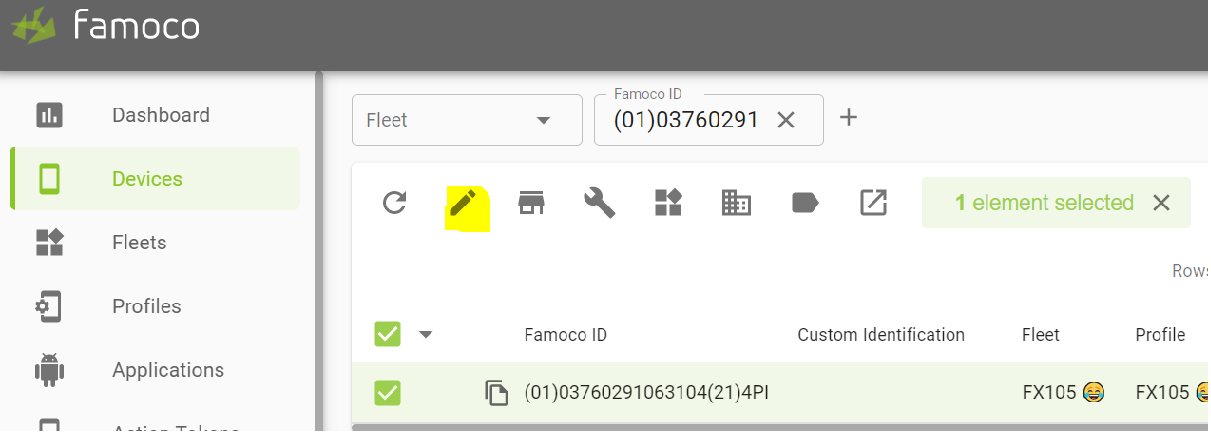
4/ Go on MDM Devices
- Copy paste the Famoco ID under the filter Famoco ID
- Make sure it’s the correct ID, then check its box and click on the pencil to edit it
5/ Add the name of the user and click on SAVE button
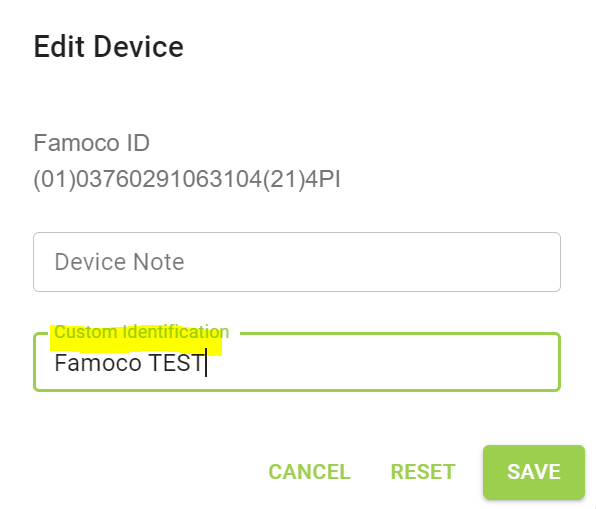
6/ The Custom ID now appears in the header and will be displayed on the device upon a sync.
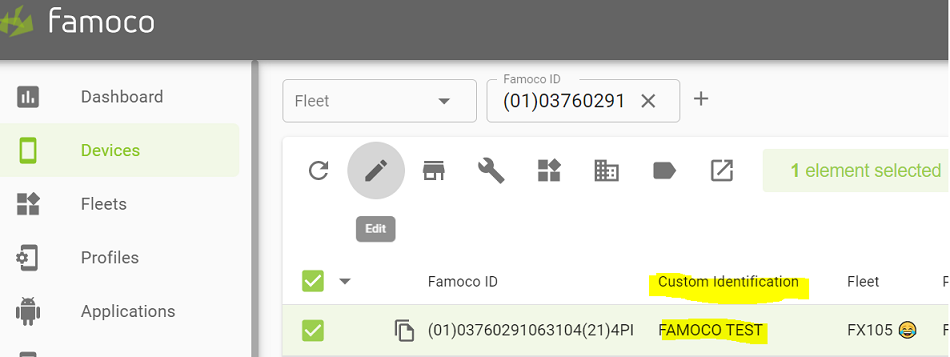
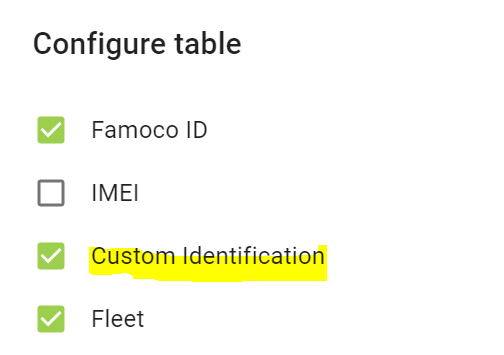
Note: To enable the header Custom Idenfitication on the MDM, click on the wheel icon (i.e. configure table), select Custom ID and save.