Dashboard
The Dashboard is the application through which all device-side configuration happens and where a lot of information is displayed.
How do I reach the Dashboard?
From any menu or application on the device, a long press of the "Home" button () on the Android navigation bar will redirect you to the Dashboard.
Additionally, in the Launcher screen or in Locked Device mode, pressing the icon next to the Famoco ID / Custom ID will redirect you to the Dashboard too.
Lastly on third party devices, during the first-time setup, pressing the "Welcome" word will also redirect you to the Dashboard.
Dashboard Tab
Notification icon
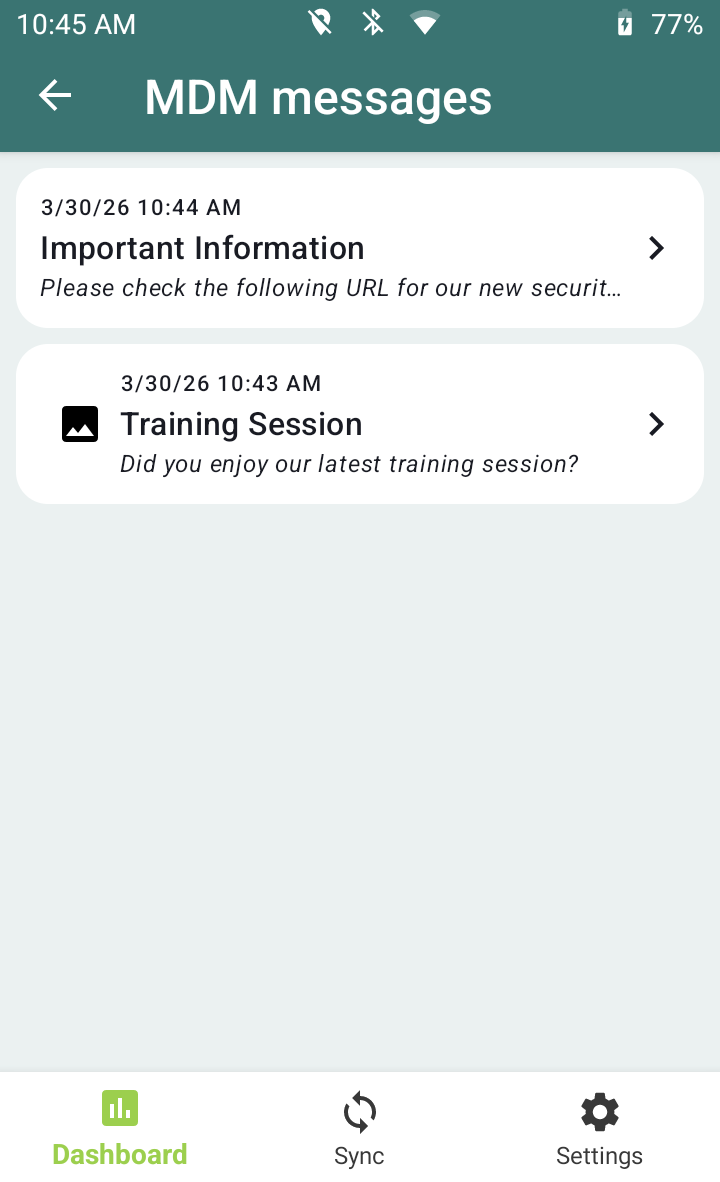
Starting from Famoco Layer version 3.24.0 and above, you may find on the right upper corner an icon representing a bell (). This icon appears if the Push Notifications feature of the MDM has been used in the past to send a message to this device, and allows you to access the history of messages the device has received.
This is particularly useful in case the user is busy at the moment they receive a notification, and want to check it at a later stage.
QR code icon
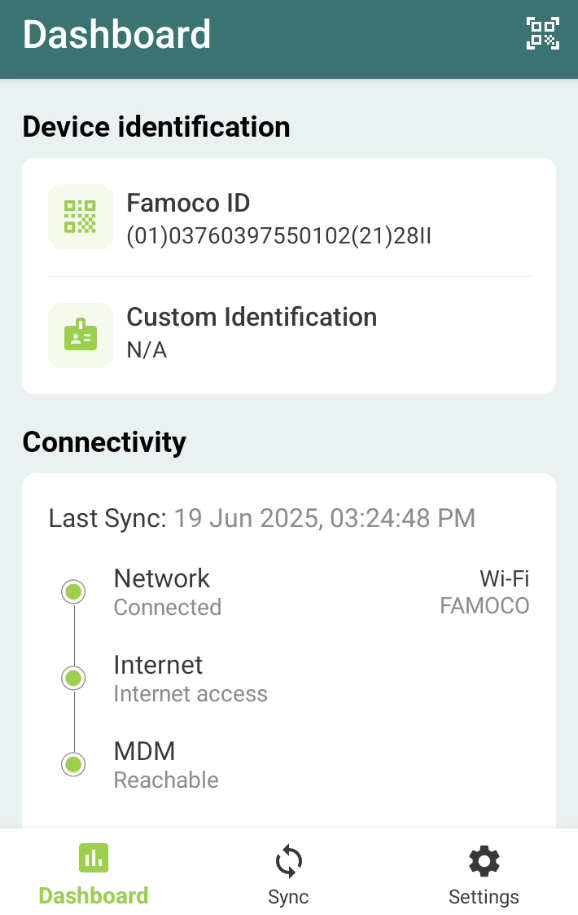
Starting from Famoco Layer version 3.14.0 and above, an icon representing a QR code () is located on the right upper corner. This icon launches a QR code reader to apply logistical actions in the field.
Click here to know more.
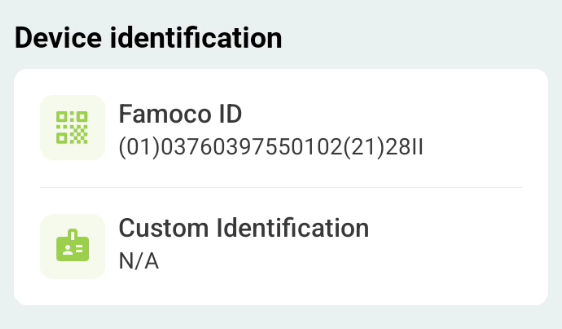
Device identification
This section allows users to identify a device by its unique ID, the Famoco ID, or through a Custom ID set either on the MDM or on the device itself. The following MDM Documentation page provides more information about the Custom ID feature.
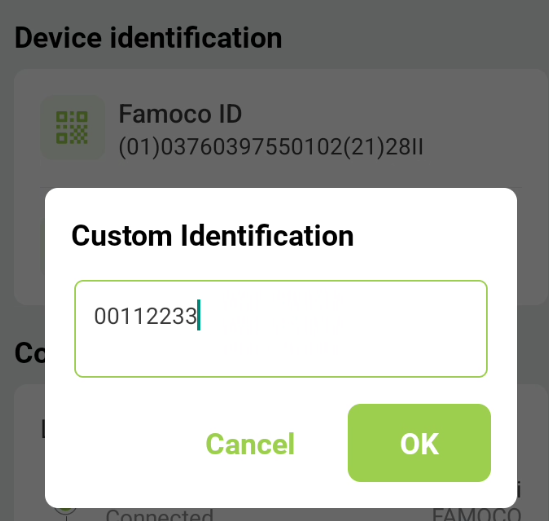
If the Custom ID mode set on the MDM profile is "Device Controlled", users will be able to set their ID by clicking on the "Custom Identification" section and writing it on the pop-up which opens.


Connectivity
This section gives users information about the connectivity status of devices:
- The first dot represents whether the device has some sort of connection set up (Wi-Fi, Mobile Data, Ethernet, ...). If no connection is set up, the icon will be red.
- The second dot represents whether that connection is able to reach the Internet. If the Internet is unreachable, the icon will be red.
- The third dot represents whether that connection is able to reach the MDM server. If the connection is behind a VPN or a firewall which restricts access to the MDM, or if the MDM is temporarily unreachable, the icon will be red.
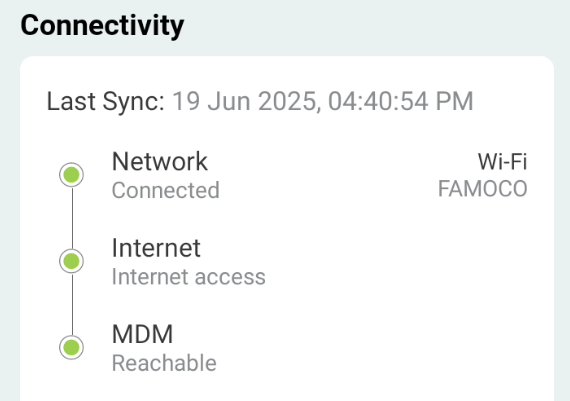
Info
In the case of devices with private APNs or limited access, which are able to access only a subset of the Internet, but are still able to access the MDM, the second dot will be orange.
Sync Tab
The Sync tab gives you an overview of the synchronization status of your device, and allows you to force a synchronization outside of its usual schedule by pressing the green "Force Sync" button.
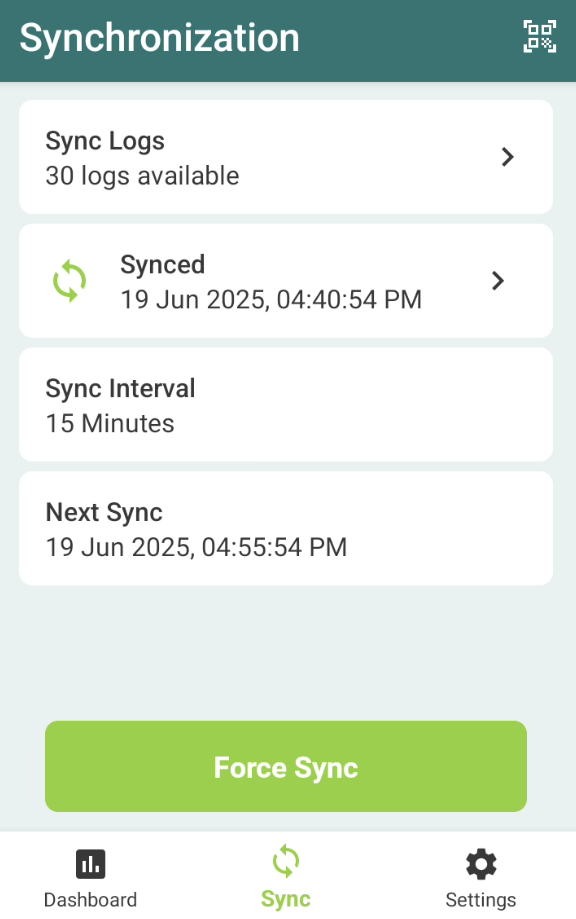
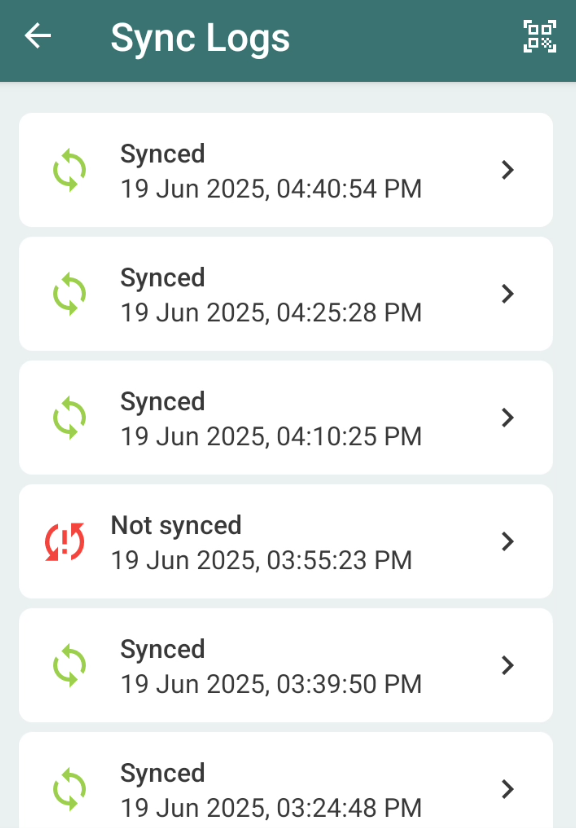
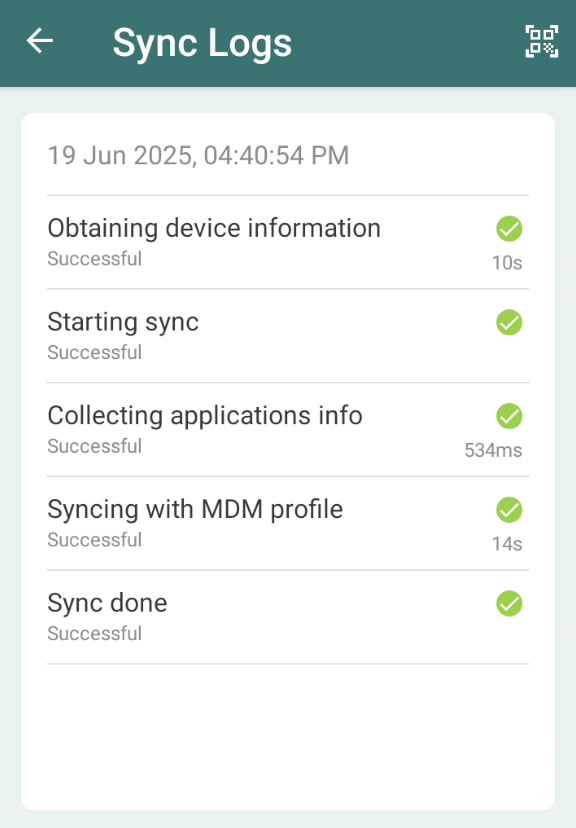
Pressing "Sync Logs" or the second element on the list above (the latest sync) gives you access to details about individual synchronizations. These details allow you to understand what actions were taken by the device, and the possible issues during synchronization.
Settings Tab
The Settings tab allows you to get a lot of information about your device, and possibly change some settings depending on the configuration set on the MDM Profile.
MDM Information
This section lists which MDM Organization the device is on, its Fleet, and its Profile.
Device Information
This section lists the Device's model, its IMEIs, SIM information, devices paired with bluetooth, the OS Version, the Famoco Applications installed on the device, and a list of Open Source software used to create the Famoco Layer.
Connectivity
This section lists the Connectivity settings on the device. Depending on the configuration put into place on the Connectivity section of the MDM Profile, some of the settings might be modifiable on the device, by pressing the toggle on the right or pressing the name of the connectivity type for advanced settings.
This is also true if you are in developer mode, for all connectivity settings.
Date & Time
This section allows you to modify date and time settings, such as the Auto Time zone setting, the Time Zone, whether Auto Time is toggled or not, and the Current Date & Time (modifiable if settings allow it).
Display & Sound
This section allows you to modify the screen brightness and the volume of the device.
Languages
The languages section displays the language set on the device, as in the Android language setting.
Applications
This menu lists all your applications installed on the device.
If you are in developer mode, you may set an application as Auto Launch directly from the device by pressing the icon.
Support

The support menu has up to three features, depending on your device's Famoco Layer version:
- From Famoco Layer version 3.22.0 and above, the "Bugreport" button allows users to send a bug report about the device, in case Famoco's Support team requests that action in order to investigate issues a bit further.
- From Famoco Layer version 3.24.0 and above, the "Network diagnostics" button allows users to test the device's connection to the internet - how it is connected (wi-fi, mobile data or ethernet), the download speed and response time.
- From Famoco Layer version 3.12.0 and above, the "Remote Control" button allows users to start a session on their device, in order for their MDM admins or the Famoco Support team to take control of the device remotely. See the following guide for more information.